There are several different ways to delete individual backups from Time Machine, but most are rather tedious, involving selecting a particular backup set and then deleting it manually.
There’s the additional complication that if you backup over a network, you’re really backing up to a sparsebundle which can only ‘grow’ in size, but will not ‘shrink’ after you delete backups without intervening to do so.
So why is this even a problem? Well, if you’re a single user with a single backup drive, it probably isn’t a problem. However, if you’re like us and use a Mac OS X Server as the central repository for your Time Machine backups with multiple client machines, then you will eventually run into the situation where you can’t add more users because the volume is ‘full.’
For example, Bob, Sally, and Joe are all clients on a Mac OS X Server TimeCapsule. They go about their business and eventually have multiple backups spanning months or years. The TimeCapsule gets close to full and Time Machine does what it is supposed to do, which is prune each individual users backups as need be.
Now the problem comes when you hire Ann and add her new machine to the Server TimeCapsule. Chances are, on the very first backup you’ll get a “Not Enough Room” to complete the backup error because Bob, Sally, and Joe’s backups are each individually using up most of the space. While individually, they trim their own personal backups as needed, there’s no mechanism to ‘release’ more space to the ‘group.’ It’s the digital equivalent of the Tragedy of the Commons. Unfortunately, the Mac OSX Server implementation of TimeCapsule isn’t smart enough to ‘broadcast’ to the existing users that they need to do extra pruning to make room for the new employee Ann.
Bummer.
It turns out in our circumstance, that the backups for the existing employees were going back 2+ years. We really don’t need to go back that far, so there were about 20+ backups on each individual’s machine that we could remove and I didn’t want to sit there and manually remove each of them from multiple different machines.
So I wrote the script at the bottom of this post. (In PHP because that’s the language I know best and use daily.)
Here are some notes:
- Because this runs from the command line in Terminal, we have to add the “#!/usr/bin/php” which would not be found in a normal PHP script. This is a default location for PHP. If you’ve changed something with your PHP install, you’ll need to modify this.
- The default timezone is required to prevent PHP from squawking. Any time zone should be fine as I’m only using date functions for validation.
- Only works on OS X 10.7 or higher.
Directions for usage.
- Turn Off Time Machine on the client you’re working on temporarily.
- Download script and save it as ‘time_machine_prune.php’ to the desktop of each client machine.
- Open Terminal and navigate to the Desktop. (If you don’t know how to use Terminal or CLI, this probably isn’t for you. Info on Terminal.
- Change the permissions to make the script executable. “chmod 751 time_machine_prune.php”
- You need to run the script as a privileged user.
-
sudo ./time_machine_prune.php
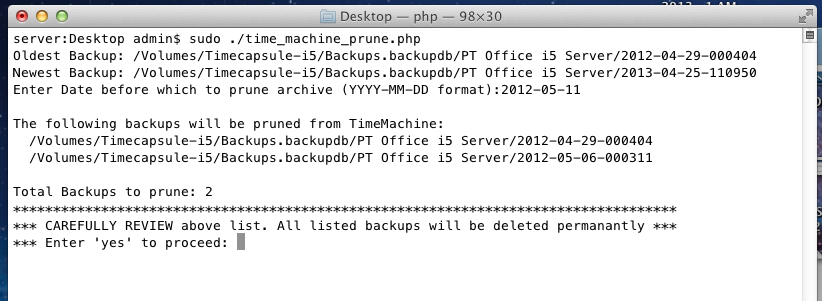
After you authenticate with your administrative password, the script will retrieve your oldest and newest backup sets to give you an estimate of your range:
Here we see that the oldest backup is from April 2012 and the newest backup is from April 2013.
Next enter a date before which you want all backups pruned. In this example, I entered 2013-05-11. The script will then show all backups that will be removed based on this date. In this case, there are two backups that would be affected.
CAREFULLY REVIEW the list before you enter ‘yes’. If you proceed, these backups will be permanently removed and there’s no way to undo it if you make a mistake. If you do not want to proceed, enter ‘no’ or anything other than ‘yes’.
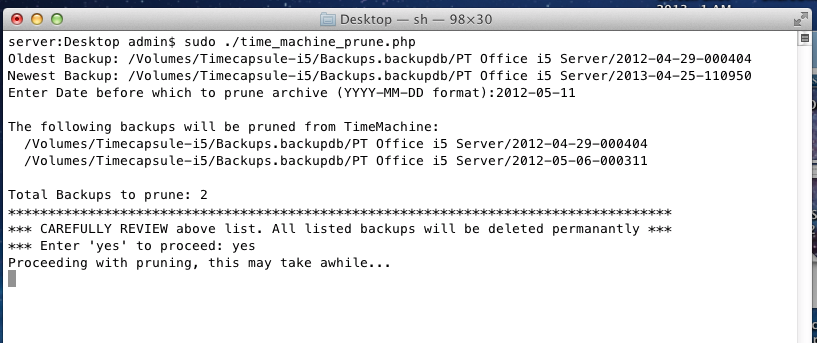
Assuming you elect to proceed, it will then start pruning the backups one after the other starting with the oldest ones first. This will take some time (many minutes or hours depending on how large your list is.)
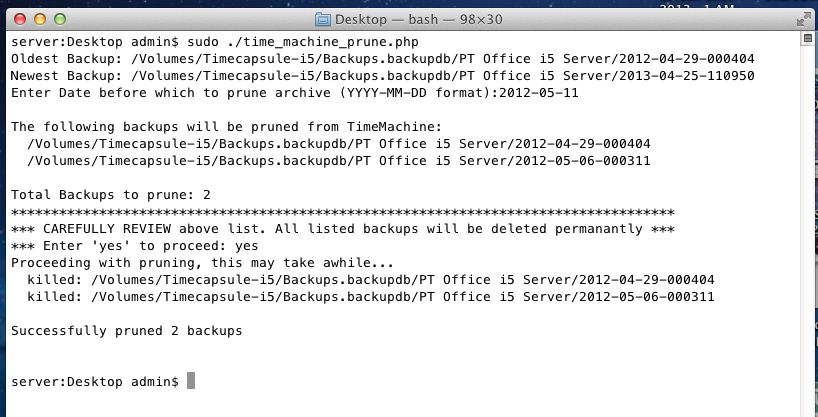
After a while, you should get the following screen indicating the number of backups pruned from the list. In this example, two were selected based on the date and two were removed.
If you ran this across the network, you now also need to compress the sparse image. See this post on Compacting Sparse Image Files. I ran it from the Server that held the images. It may also work from the client machine, but I didn’t try that.
Essentially you need to navigate to your Timecapusle and then into Shared Item->Backups. From there run the command:
sudo hdiutil compact /Volumes/Timecapsule/Shared\ Items/Backups/the_machine_just_pruned.sparsebundle
The Script
#!/usr/bin/php
<?php
date_default_timezone_set ( 'America/Los_Angeles' );

$all_backups 	= array();
// get the name of the computer
exec('/usr/sbin/scutil --get ComputerName',$computer_name);
// get a list of all the backups for that computer
exec("/usr/bin/tmutil listbackups | /usr/bin/grep \"".$computer_name[0]."\"",$all_backups);

echo "Oldest Backup: " . $all_backups[0] . "\n";
echo "Newest Backup: " . $all_backups[count($all_backups)-1] . "\n";

echo "Enter Date before which to prune archive (YYYY-MM-DD format):";
$handle = fopen ("php://stdin","r");
$line 	= fgets($handle);

$date_format = 'Y-m-d';

$input			= trim($line);
$prune_time 	= strtotime($input);
$is_valid 		= date($date_format, $prune_time) == $input;

if ($is_valid) {
	// The user entered a valid date, procced.
	foreach ($all_backups as $single_backup) {
		$path_parts = pathinfo(trim($single_backup));
		preg_match( "/^([0-9]{4}-[0-9]{2}-[0-9]{2})(-.*)/",$path_parts['basename'],$matches);
		if(!$matches[1]) {
			// found a backup with a non-conforming name: ABORT!
			// this script is not robust enought to deal with non-conforming backup names
			echo "Error in matching backups to regex\n";
			exit;
		}
		$time = strtotime($matches[1]);
		// build a key/value list based on time of the backup.
		$time_list[$time] = $single_backup;
		unset($matches);
	}
	$count_prune = 0;
	$prune_list  = array();
	echo "\nThe following backups will be pruned from TimeMachine:\n";
	foreach ($time_list as $bu_time=>$bu_name) {
		// walk thru the list and compare the prune date (expressed as time) to the
		// time_list. Anything less than the user entered value gets added to the
		// prune_list array
		if ($bu_time < $prune_time) {
			echo "  $bu_name\n";
			$count_prune ++;
			$prune_list[] = $bu_name;
		}
	}
	echo "\nTotal Backups to prune: $count_prune\n";
	echo "***********************************************************************************\n";
	echo "*** CAREFULLY REVIEW above list. All listed backups will be deleted permanantly ***\n";
	echo "*** Enter 'yes' to proceed: ";
	$handle = fopen ("php://stdin","r");
	$line 	= fgets($handle);
	$input	= trim($line);
	if ($input == 'yes') {
		// user has elected to proceed with the prunning of the backup.
		echo "Proceeding with pruning, this may take awhile...\n";
		$kill_count = 0;
		foreach ($prune_list as $backup_to_kill) {
			// for each entry in the prune_list, use tmutil to delete that backup
			exec("/usr/bin/sudo /usr/bin/tmutil delete \"$backup_to_kill\"",$result);
			echo "  killed: $backup_to_kill\n";
			$kill_count ++;
		}
		echo "\nSuccessfully pruned $kill_count backups\n";
	} else {
		// user entered something other than 'yes' on the command line.
		echo "Pruning Canceled!! \n";
	}
} else {
	// user entered an invalid date.
	echo "$line is an invalid date. It must be entered in YYYY-MM-DD format\n";
	exit;
}
echo "\n\n";
?>

